Mod:Create an item
Revision as of 20:22, 25 September 2022 by Anabellebel (talk | contribs) (→Change the characteristics)
This tutorial explains how to create or modify an item in The Sum.
Required tools[edit | edit source]
Before you start[edit | edit source]
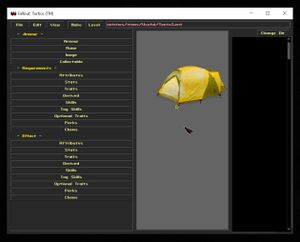
Take some time to learn how the Entity editor works by checking out the readme file of the Fallout Tactics editor.
Create a new item[edit | edit source]
Existing item as basis[edit | edit source]
- Open the Game/ folder and then FT Improver.EXE
- Pass the videos by clicking on them.
- Click on ⦿ MORE.
- Click ⦿ ENTITY EDITOR.
- Navigate to the Filemenu thenOpen.
- Open a file of the same type as the one to be created, which must end with .ent (stored in Game/core/entities/Weapons/ or Game/core/entities/Items/).
- Go to the Filemenu thenSave As.
- Save this item under another name in the same folder
Modify an item[edit | edit source]
Open the file (Entity editor)[edit | edit source]
- Open the Game/ folder and then FT Improver.EXE
- Pass the videos by clicking on them.
- Click on ⦿ MORE.
- Click ⦿ ENTITY EDITOR.
- Navigate to the Filemenu thenOpen.
- Open the file of your item previously created which must end with .ent.
Name and description[edit | edit source]
Every item has a name and a description, stored in Game/NousAurons/locale/Game/items.txt (French version) and Game/core/locale/Game/items.txt (English version).
- Open the two files items.txt and for each of them:
- Under OBJECTS (DESCRIPTION & NAMES), copy/paste the following code:
name_of_item_code_name = {Name of item}
desc_item_code_name = {<Cw>Description of the item in the appropriate language.\n\n<Jc><rgb:125,125,125>USE}
- Under OBJECTS (DESCRIPTION & NAMES), copy/paste the following code:
- USE: This short message (appearing in gray), indicates the use (and sometimes the effect) of the object. Example: "Eat DBL-CLICK\nHUNGER ÌÌÌ" (where Ì corresponds to ↓ in the game).
- Open the item file
- Expand the Nametab.
- To the right of Display Name :, add the item's code name.
- Go to the Filemenu thenSave.
Change the image and colors[edit | edit source]
- Open the item file
- Expand the Imagetab.
- Click on the ...button to select an appearance to assign to your item (sprite or .spr file).
 It is not very useful to change the colors of an item, but 4 menus allow you to do so, with two dimmers, the first one controlling saturation and the second one controlling the color level
Assign a code name[edit | edit source]
A code name allows the item to be unique and recognized by scripts, in a quest for example.
- Open the item file
- Expand the Nametab and type in the code name of your choice to the right ofTag Name :.
- Go to the Filemenu and thenSave.
Change the characteristics[edit | edit source]
There are an infinite number of possible variations for the characteristics of an item you create...
- Open the item file
- Expand the Tabsof your choice and change the features that you think are appropriate.
- The first word at the top, whether - Yellow - or Red, indicates the item type.
- The first section (under - Section name -) is about the main characteristics of the item, such as its code name, its image (sprite), its value, whether or not it produces a primary, secondary effect, etc.
- Under - Requirements -, the data entered is required to use the item.
- Under - Effect -, the data entered affects the character wearing the item (as a garment or in their hand).
- Under - Primary (Secondary, Final) Effect -, the data entered affects the character who consumes (double-clicks on) the item, provided the fields associated with them at the top: Effect [0,1 or 2] enabled:are checked (✓) with a set duration. If the duration is 0, the effect will be permanent.
- Under - Addiction Effect -, the data entered affects the character who consumes (double-clicks on) the item and becomes addicted to it, provided that the field associated with it at the top: Addiction enabled:be checked (✓) with a fixed duration. If the duration is 0, the effect will be permanent. The chance of falling addicted depends on theChanceOfAddiction:field just below it.
- Under - Weapon Modes -, the data entered adds one of the attack modes to a weapon.
- Go to the Filemenu thenSave.
