Mod:Create an item
Jump to navigation
Jump to search
 The Sum already has a lot of generic items, so it is not recommended to add new ones. Some special (unique) items for lore purposes are however often necessary.
  Items including several elements that are necessary for the game to function properly in general, it is recommended that you create an item from an existing item in the folder Game/core/entities/Weapons/ or in the folder Game/core/entities/Items/
This tutorial explains how to create or modify an item in The Sum.
Required tools[edit | edit source]
Before you start[edit | edit source]
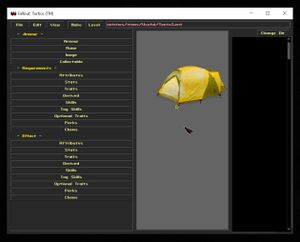
Take some time to learn how the Entity editor works by checking out the readme file of the Fallout Tactics editor.
Create a new item[edit | edit source]
Existing item as basis[edit | edit source]
- Open the Game/ folder and then FT Improver.EXE
- Pass the videos by clicking on them.
- Click on ⦿ MORE.
- Click ⦿ ENTITY EDITOR.
- Navigate to the Filemenu thenOpen.
- Open a file of the same type as the one to be created, which must end with .ent (stored in Game/core/entities/Weapons/ or Game/core/entities/Items/).
- Go to the Filemenu thenSave As.
- Save this item under another name in the same folder
Modify an item[edit | edit source]
Open the file (Entity editor)[edit | edit source]
- Open the Game/ folder and then FT Improver.EXE
- Pass the videos by clicking on them.
- Click on ⦿ MORE.
- Click ⦿ ENTITY EDITOR.
- Navigate to the Filemenu thenOpen.
- Open the file of your item previously created which must end with .ent.
Name and description[edit | edit source]
Every item has a name and a description, stored in Game/NousAurons/locale/Game/items.txt (French version) and Game/core/locale/Game/items.txt (English version).
- Open the two files items.txt and for each of them:
- Under OBJECTS (DESCRIPTION & NAMES), copy/paste the following code:
name_of_item_code_name = {Name of item}
desc_item_code_name = {<Cw>Description of the item in the appropriate language.\n\n<Jc><rgb:125,125,125>USE}
- Under OBJECTS (DESCRIPTION & NAMES), copy/paste the following code:
- USE: This short message (appearing in gray), indicates the use (and sometimes the effect) of the object. Example: "Eat DBL-CLICK\nHUNGER ÌÌÌ" (where Ì corresponds to ↓ in the game).
- Open the item file
- Expand the Nametab.
- To the right of Display Name :, add the item's code name.
- Go to the Filemenu thenSave.
Change the image and colors[edit | edit source]
- Open the item file
- Expand the Imagetab.
- Click on the ...button to select an appearance to assign to your item (sprite or .spr file).
 It is not very useful to change the colors of an item, but 4 menus allow you to do so, with two dimmers, the first one controlling saturation and the second one controlling the color level
Assign a code name[edit | edit source]
A code name allows the item to be unique and recognized by scripts, in a quest for example.
- Open the item file
- Expand the Nametab and type in the code name of your choice to the right ofTag Name :.
- Go to the Filemenu and thenSave.
Change the characteristics[edit | edit source]
There are an infinite number of possible variations for the characteristics of an item you create...
- Open the item file
- Expand the Tabsof your choice and change the features that you think are appropriate.
- The first word at the top, whether - Yellow - or Red, indicates the item type.
- The first section (under - Section name -) is about the main characteristics of the item, such as its code name, its image (sprite), its value, whether or not it produces a primary, secondary effect, etc.
- Under - Requirements -, the data entered is required to use the item.
- Under - Effect -, the data entered affects the character wearing the item (as a garment or in their hand).
- Under - Primary (Secondary, Final) Effect -, the data entered affects the character who consumes (double-clicks on) the item, provided the fields associated with them at the top: Effect [0,1 or 2] enabled:are checked (✓) with a set duration. If the duration is 0, the effect will be permanent.
- Under - Addiction Effect -, the data entered affects the character who consumes (double-clicks on) the item and becomes addicted to it, provided that the field associated with it at the top: Addiction enabled:be checked (✓) with a fixed duration. If the duration is 0, the effect will be permanent. The chance of falling addicted depends on theChanceOfAddiction:field just below it.
- Under - Weapon Modes -, the data entered adds one of the attack modes to a weapon.
- Go to the Filemenu thenSave.
