Mod:Edit a main character
This tutorial explains how to edit your starting character in The Sum. [[file:Entity Editor.jpg|thumb|This tutorial uses the Entity Editor.
Required tools
Before you start
Take some time to learn how the Entity Editor works by checking out the "readme" file of the Fallout Tactics Editor.
Access your starting character
- Open the Game/ folder then FT Improver.EXE.
- Pass the videos by clicking on them.
- Click on ⦿ MORE.
- Click ⦿ ENTITY EDITOR.
- Navigate to the Filemenu thenOpen.
- Open the desired starting character which must end with .ent (stored in Game/core/entities/Actors/prefab).
| Character name | Picture | File name |
|---|---|---|
| Mara | 
|
prefab1.ent |
| Marais | 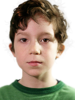
|
prefab2.ent |
| Veille | 
|
prefab3.ent |
| Dann | 
|
prefab4.ent |
| Chance | 75px | prefab5.ent |
| Monréal | 
|
prefab6.ent |
| Nouvelle | 
|
prefab7.ent |
| Basque | 
|
prefab8.ent |
| Franche | 
|
prefab9.ent |
| Hiverse | 
|
prefab10.ent |
| Isabette | 
|
prefab11.ent |
| Géorgy | 
|
prefab12.ent |
| Kadi | 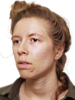
|
prefab13.ent |
| Tempo | 
|
prefab14.ent |
| Épi | 
|
prefab15.ent |
| Brave | 
|
prefab16.ent |
| Amérique | 
|
prefab17.ent |
| Leg | 
|
prefab18.ent |
| Talée | 
|
prefab19.ent |
| Read | 
|
prefab20.ent |
| Mercie | 
|
prefab21.ent |
| Vaillant | 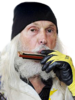
|
prefab22.ent |
- Go to the menu FilethenSave As.
- Save this character under a different name in the same folder.
 The character should be stored in a folder corresponding to the location where it appears. If the filename of this location does not appear in "___HABITANTS", create this folder first with "Windows Explorer" and then save your character in it.
Editing a character
Open the file (Entity editor)
- Open the Game/ folder then FT Improver.EXE
 Use FT Tools.exe instead will result in an error
. - Pass the videos by clicking on them.
- Click on ⦿ MORE.
- Click ⦿ ENTITY EDITOR.
- Navigate to the Filemenu thenOpen.
- Open the file of your character previously created which must end with .ent.
Name character
Every character has a name, stored in Game/NousAurons/locale/Game/characters.txt (French version) and Game/core/locale/Game/characters.txt (English version).
- Open the two files characters.txt and for each of them:
- Press ctrl+fand search for "//PRÉNOMS DES HABITANTS"
- Directly below, copy/paste the following code:
name__character_code_name = {character name}
- Press
- Open the character file
- Expand the Nametab.
- To the right of Display Name, add your character's code name. This name should not include the word "name_", but rather look like this: "_character_code_name". The "_" bar indicates that this is a unique character
- Go to the Filemenu and thenSave.
Add a bio (for companions)
If the character you create does not join the player's group as a companion, skip this step. As for the name, the bio of a character is stored in Game/NousAurons/locale/Game/characters.txt (French version) and Game/core/locale/Game/characters.txt (English version).
- Open the two files characters.txt and for each of them:
- Press ctrl+fand search for "//RECRUES"
- Directly below, copy/paste the following code:
name__code_name_of_character = {Name of character}
desc__character_code_name = {<Ck>LOCATION\nPROFESSION\nBiography appearing in the language appropriate to the version of '''characters.txt''}
- Press
- LOCATION: Name of the location where the companion is recruited.
- PROFESSION: Primary or official profession of the companion. There may be more than one. If the character_code_name has been correctly assigned in the entity editor, the character's name and bio should appear correctly.
- Save the document.
Create a portrait
To create a portrait from an image, see Mod:Create a portrait.
Assign a portrait
Using the code name of your character, it is easy to assign them a portrait.
- Open the folder Game/core/gui/char/ then choose a portrait in the list.{{Idea|If you can not see the portraits by double-clicking on them, [[Mod:Programs_recommended#Red.21Viewer|install Red!Viewer]}}
- Copy/paste this .zar file in the same folder renaming it "_character_code_name.zar". Don't forget to add a "_" bar before the character code name.
Change characteristics
There are an infinite number of possible variations for the characteristics of the character you create, and they can have a Level of autonomy varying from beginner to very high...
- Open the character file
- Click on the Makebutton to the right of the top menu.
- Customize the character by clicking on the NameAgeAppearancebuttons on top.
- Using the +and-buttons as well as the ☻ and ☻ buttons, assign any characteristics of your choice to the character and press⦿ OK
- Once this step is completed, expand the customNametab and delete the name you entered earlier (to the right ofcustomName). To assign a name to the character, follow these steps instead.
- Once this step is completed, expand the
- To add Levels to the character:
- Click the Levelbutton to the right of the menu at the top.
- Press the +button to the right of "Autonomy" the number of times you want.
- Select a Perk when prompted.
- Assign all points earned from the Skills on the right using the +and-buttons. Holding down the shiftkey by clicking on these buttons adds or subtracts 10 points for each click
- Press ⦿ OK.
- Click the
- Navigate to the Filemenu and thenSave.
Change the colors
- Open the character file
- Expand the Imagetab.
- 4 menus allow you to change the character's colors, with two dimmers, the first controlling the saturation and the second the color level. Don't change the "Sprite" just above, this data will immediately revert to its default value following a save. To change the character's appearance, change the character's equipment instead.
Equipment (level editor)
- Add a character in a location Their .ent file should be stored beforehand in Actors/___Inhabitants/location_code_name/'
- Click on the tab Entity Editthen click on the character.
- To add items worn by the character:
- Scroll left to the Hand1_field.
- The Hand1_andHand2_fields indicate the objects in the character's two hands.
- The Armour_field indicates the clothing or armor worn by the character that may change their appearance.
- The
- Click on the ...button to select an item to add to one of these fields (weapons are in the weapons/ folder, clothes are in the items/Armor folder).
- Check the box under the fields *_overridethat you have filled with an item to indicate that this item will be used.
- Scroll left to the
- To add items in the bag of the character:
- Scroll down to the large black rectangle with the addanddelbuttons on top of it.
- Click on the addbutton to select an item to add (items are located in the items/ folder.
- Scroll down to the large black rectangle with the
- Go to the Filemenu thenSave.
Equipment (Entity editor)
- Open the character file
- To add items worn by the character:
- Expand the Equippedtab.
- The Hand1andHand2fields indicate the objects in the character's two hands.
- The Armourfield indicates the clothing or armor worn by the character that may change their appearance.
- The
- Click on the ...button to select an item to add to one of these fields (weapons are in the weapons/ folder, clothes are in the items/Armor folder).
- Expand the
- To add items in the bag of the character:
- Expand the Inventorytab.
- Click on the addbutton to select an item to add (items are located in the items/ folder). Don't overload the character with items for no good reason because they won't be able to move around
- Expand the
- Go to the Filemenu thenSave.
Life points
If you added Autonomy Levels to your character, it is important to adjust their Life points to ensure that they are not injured (and therefore potentially hostile) as soon as the player encounters them.
- Calculate the number of Life Points the character needs using the following form. Get the character's Strength, Endurance and Autonomy Level by clicking the Levelbutton at the top of the page in the Entity Editor.
- In the Entity Editor, expand the very last tab ActorStatus.
- To the right of hitPoints, replace the current number with the calculated number of Life Points.
- Go to the Filemenu thenSave.
Placing a character in a location
Check out the tutorial at there (and follow the steps)